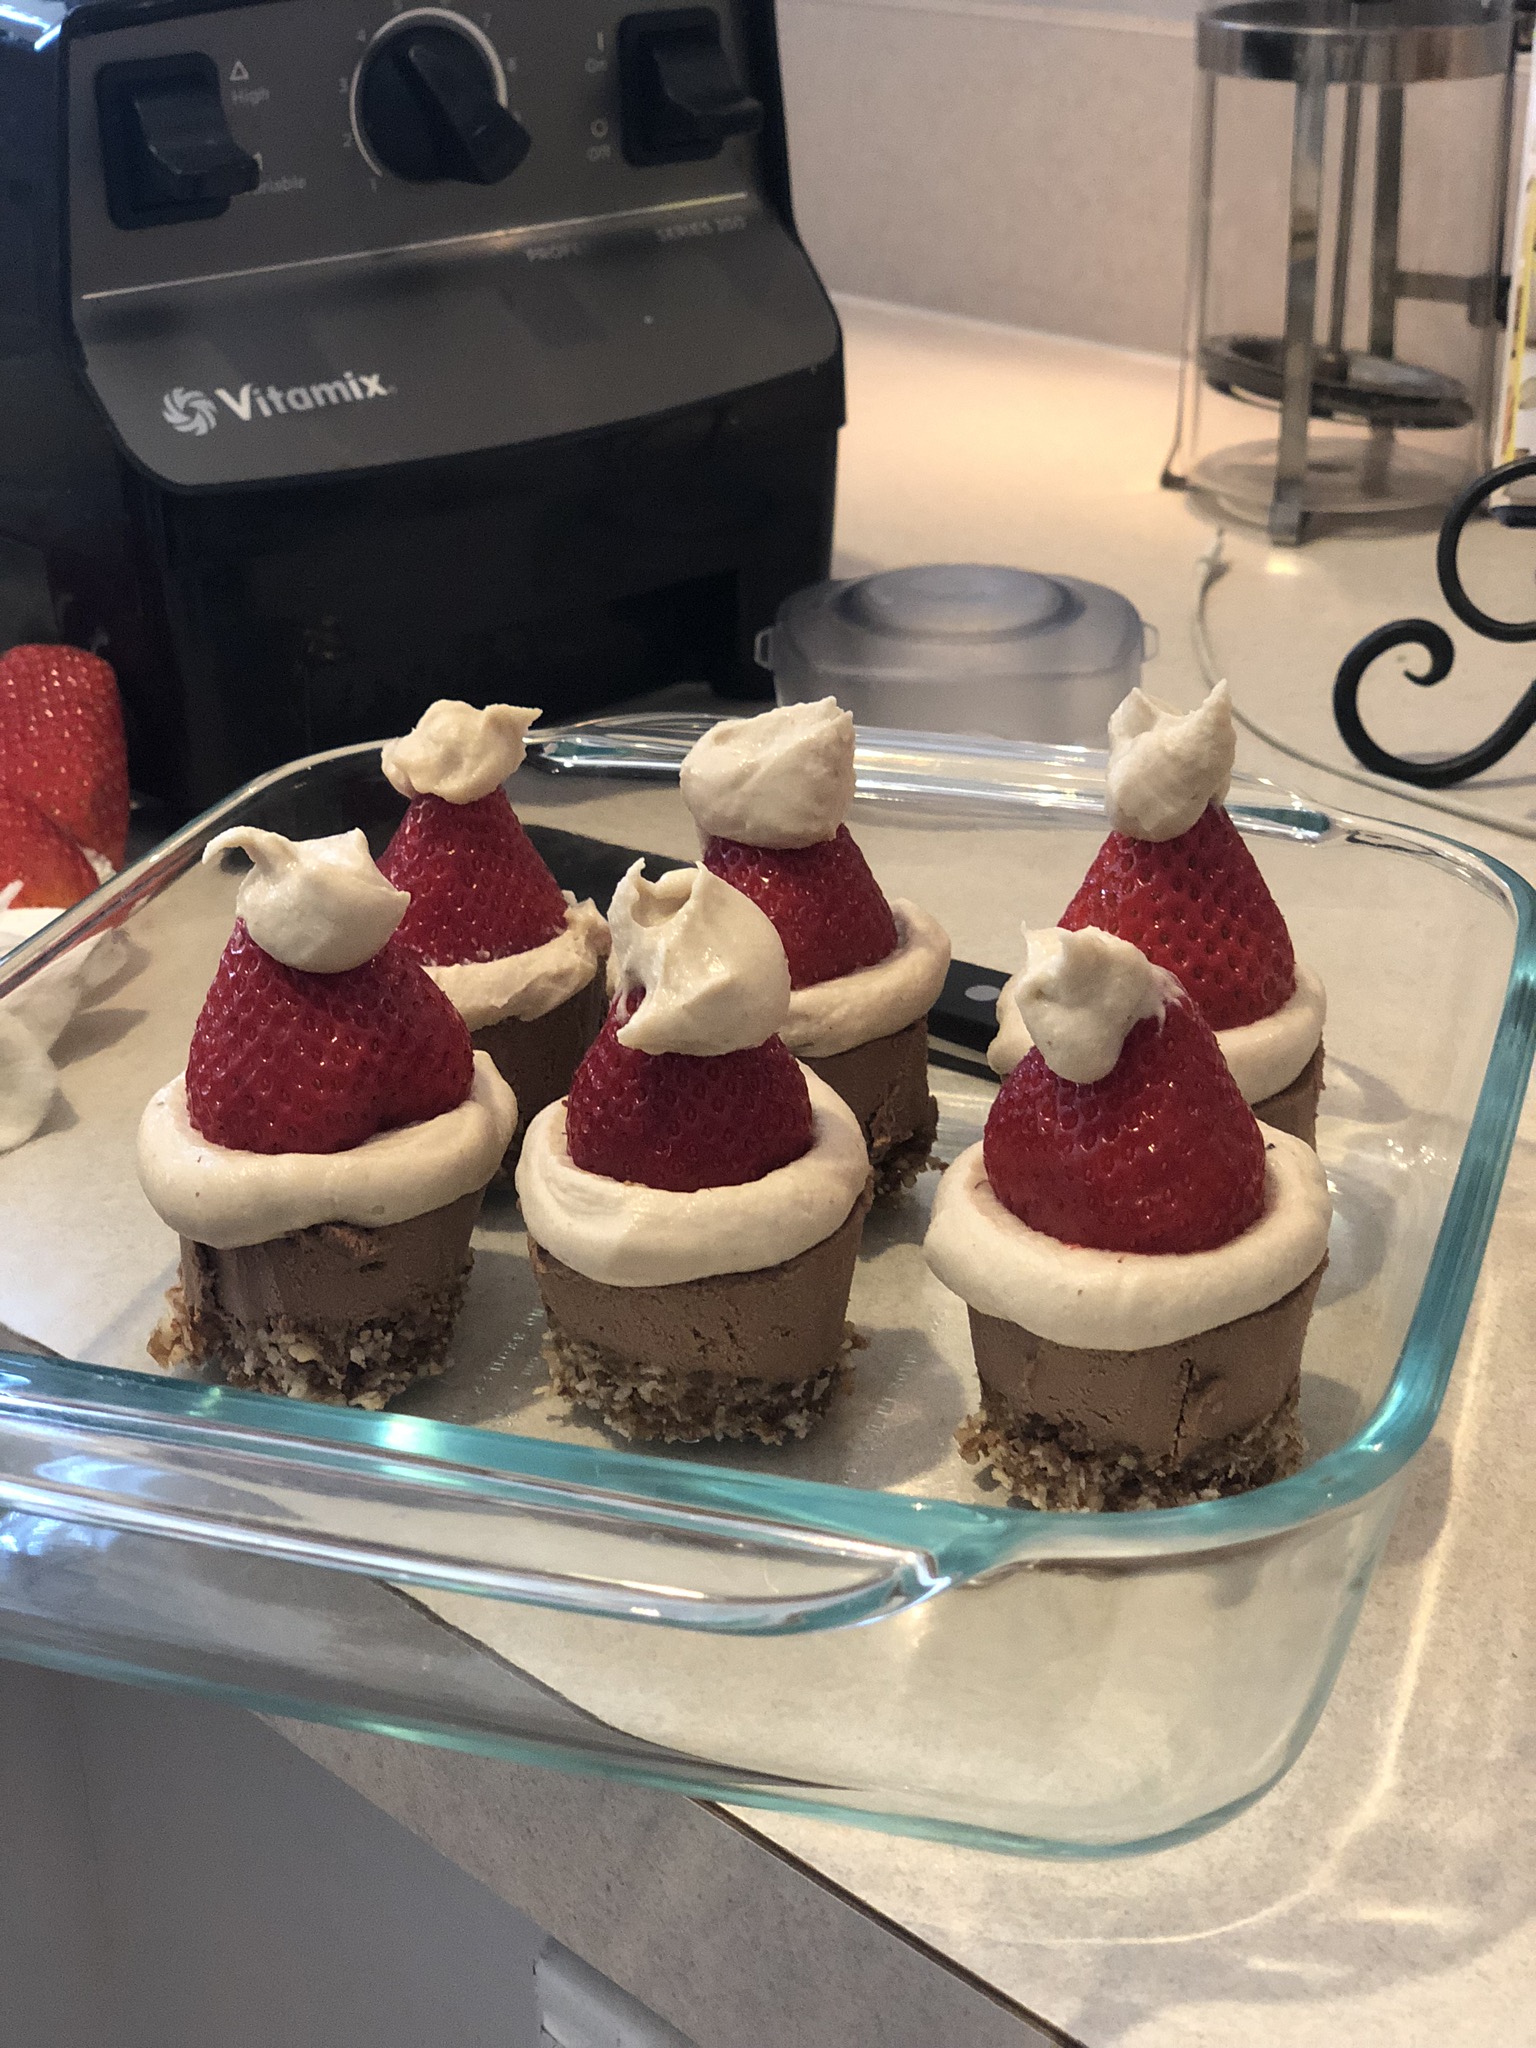
Santa Hat Cheesecake Bites [GF, DF, SF]
Dec 27, 2018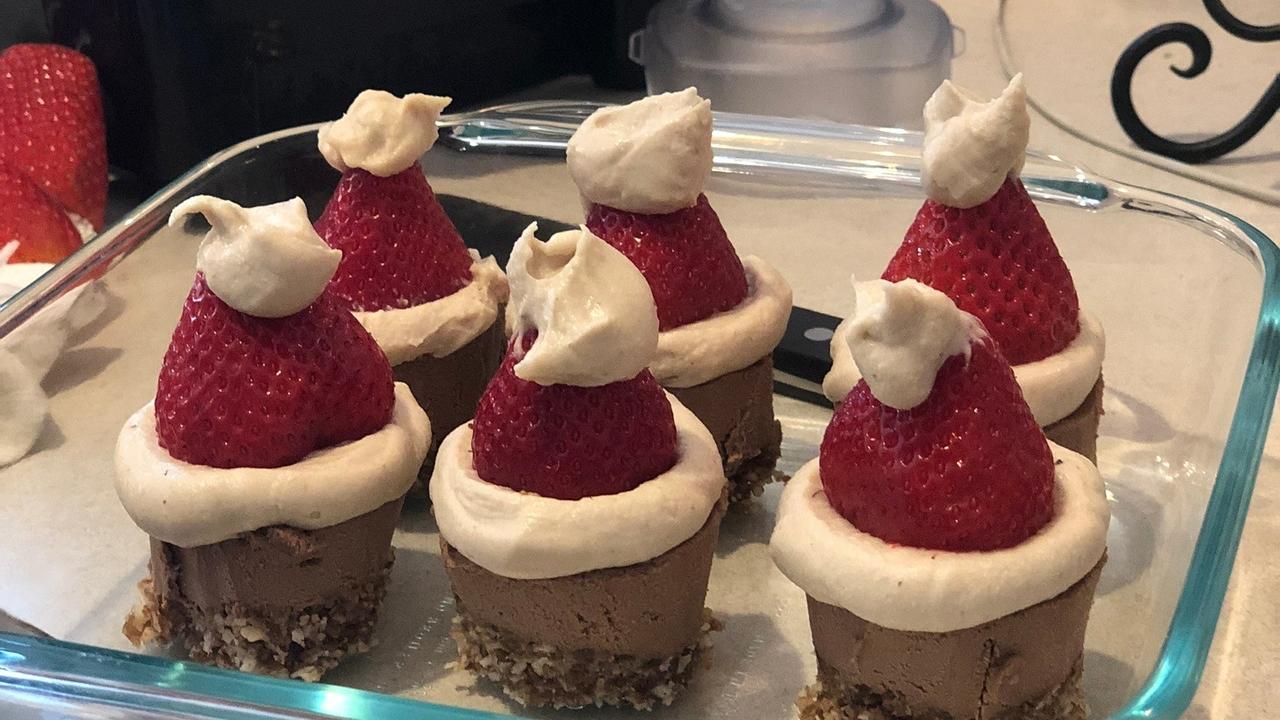
Santa Baby, Hurry Down the Chimney Tonight
With a gluten free, dairy free, refined sugar free chocolate and vanilla, cheesecake for me.
Sung to the tune of Santa Baby, in my best Eartha Kitt voice.
Okay, these were an absolute hit at Christmas Eve dessert table! Kids and adults alike loved them and no one seemed to care that they were missing the gluten, dairy and refined sugar typically found in regular cheesecake. Not to mention, they're vegan.
Yes it is possible to make a dessert that ALL your guests will enjoy no matter their dietary preferences!
 Note: Map out your circles across the top of your chocolate layer. Save the scraps.
 To make these Santa hat cheesecake bites you will need a chocolate cheesecake with a coconut pecan base (I made it in a springform pan but you might consider using parchment paper cupcake liners), vanilla creme cooled in plastic baggies for easy squeezing and strawberries. That's it!
A few notes to keep in mind:
Timing: The cake itself is quite easy to make but there is some required refrigeration/freezer time that draws the process out over the course of 2-3 hours. So you will want to plan for some extra time even though everything comes together rather quickly.
Sweetness: I based the chocolate and vanilla cheesecake layers on my layered pumpkin pie cheesecake with a few tweaks, which I'll share below. The coconut pecan base of this cheesecake is a little sweeter than my pumpkin pie cheesecake. So if you are not into the extra sweetness, simply make the other recipe for the crust.
The Recipe: As you read through the recipe below, don't be alarmed by the lengthiness. Typically you can make everything in fewer steps (see the Pumpkin Pie Cheesecake), but due to the artistic nature of making the Santa hats, more steps were required. All in all it's a fun process and even better when you see the kid's faces light up on Christmas Eve!
Chocolate & Vanilla, Santa Hat Cheesecake Bites
Ingredients
For the crust2 Tbsp maple syrup
Get the Goods
First make the crust
1. In a food processor, pulse together all ingredients until sticky and crumblyNext make the chocolate filling
1. In a high powered blender, combine the cashews, coconut cream, maple syrup, cacao powder, coconut oil and vanilla extract and blend until smoothNext make the vanilla filling
1. In a high powered blender, combine the cashews, coconut cream, maple syrup, dates, lemon, coconut oil and vanilla extract and blend until smoothNow Assemble the Santa Hats
1. Start with the chocolate layer first (remove the springform pan side)Notes
- Coconut cream: I use Organic Heavy Coconut Cream by Let's Do Organic. You can also use the top from any canned coconut milk. Just place in the refrigerator for a few hours beforehand to separate the cream from the liquid.
- Storage: These will last nicely in the freezer if you have extras
- No spring form pan: You can also use a pie dish. But make sure it is nice and deep because the layers do stack up nice and high.
- Naturally sweet: I love the subtle sweetness of this pie but be sure to taste test as you go to ensure your desired level of sweetness is reached.
- For the lemon: You are not using just the juice, use the whole half of the lemon. Use a knife to peel off the skin, then remove any seeds and toss it in the blender.
DO TELL...Who do you think would LOVE these Santa Hats? Share it with them!
This recipe was created by Jessica Yeager, CNE <–click the link and come hang out on FB with me!
Or tag me on the gram with #jessicayeagercne if you make this recipe! I LOVE seeing your creations <3
Author


